
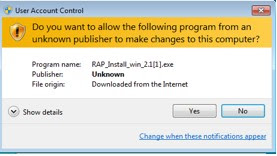
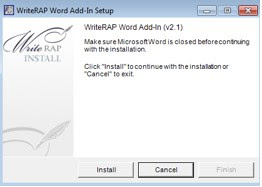
1. Click Run.

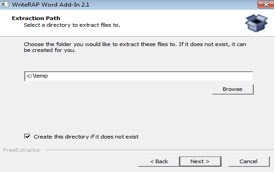
3. Click Next.


After the installation is completed, the WriteRAP toolbar should appear in the Add-Ins tab of any Word document that is open. If the Add-Ins tab does not appear, then you have to do the following. Note that this would be a one time adjustment of your toobar.
In order to add or attach templates, you need access to the Developer tab in the ribbon. To have the Developer ribbon appear, follow these steps:
- On your toolbar go to: Customize Quick Access Toolbar > Quick Access Toolbar > Choose Commands From > Popular Commands > Developer tab.
2. Click OK.
This gives you access to the Templates and Add-Ins dialog. It’s similar to the one in Word 2003. To add a template (this example uses the WriteRAP toolbar template), follow these steps:
1. In Word 2010, click the Developer tab.
2. Click Document Template. The Templates and Add-Ins dialog appears.
3. Click Add. If you placed it in the location indicated previously, your template should appear in the default folder that opens.
4. Double-click the template that you wish to add (rapToolbar_win_2.1.dot). It should now appear in the Global Templates and Add-ins pane with a check mark next to it.
5. Click OK.


No comments:
Post a Comment