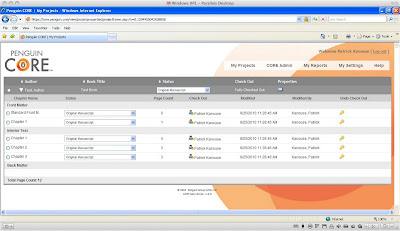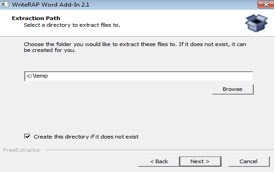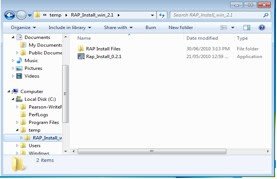
Several members of your WriteRAP team are today in sessions discussing Penguin CORE, which was developed by Penguin using WriteRAP as a starting point, though it is significantly different in its code base at this time.

Macintosh
• Mac OS X version 10.2.8 or later
• Safari 2 or later
• Flash Player 8 or later
• Minimum screen resolution of 800x600
• Active Internet connection
• Microsoft Word 2004
• WriteRAP Add-In for Word
Windows
• Windows 2000, ME, XP, Vista, or 7
• Internet Explorer 5.5 or later
• Flash Player 8 or later
• Minimum screen resolution of 800x600
• Active Internet connection
• Microsoft Word 2000, XP 2002, 2003, 2007, or 2010
• WriteRAP Add-In for Word
Notice the gap there? Word 2008 for the Mac is not supported by the WriteRAP system. So what's the deal? Why is that?
First and foremost, you should understand that WriteRAP makes extensive use of VBA. Microsoft decided to remove VBA support from the Word 2008 version. The good news is that VBA support will be re-introduced in the upcoming Word release for Mac. But that leaves Word 2008 out in the cold. Almost.
Word 2008 can be used in an "offline" workflow, by which I mean it can be used outside the normal WriteRAP processes. This entails, of course, several caveats:


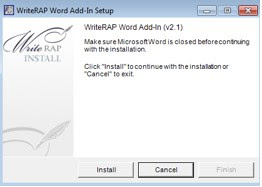
1. Click Run.


After the installation is completed, the WriteRAP toolbar should appear in the Add-Ins tab of any Word document that is open. If the Add-Ins tab does not appear, then you have to do the following. Note that this would be a one time adjustment of your toobar.
In order to add or attach templates, you need access to the Developer tab in the ribbon. To have the Developer ribbon appear, follow these steps:
2. Click OK.
This gives you access to the Templates and Add-Ins dialog. It’s similar to the one in Word 2003. To add a template (this example uses the WriteRAP toolbar template), follow these steps:
1. In Word 2010, click the Developer tab.
2. Click Document Template. The Templates and Add-Ins dialog appears.
3. Click Add. If you placed it in the location indicated previously, your template should appear in the default folder that opens.
4. Double-click the template that you wish to add (rapToolbar_win_2.1.dot). It should now appear in the Global Templates and Add-ins pane with a check mark next to it.
5. Click OK.
| Vendor | Extractions | Styling | Template Build | Project Mgmt | Overseas/ Domestic Partner |
| Aptara | yes | yes | yes | yes | |
| GEX, Inc. | yes | yes | yes | yes | |
| Integra | yes | yes | yes | yes | Bookmasters, Elm Street |
| Laserwords | yes | yes | yes | Pine Tree | |
| Macmillan Publishing Solutions (MPS) | yes | yes | yes | yes | |
| Premedia Global (PMG) | yes | yes | yes | yes | GGS, Prepress |
| S4Carlisle | yes | yes | yes | yes | |
| Bookmasters | yes | Integra | |||
| Carlisle | yes | S4 | |||
| GGS | yes | PMG | |||
| Pine Tree | yes | Laserwords | |||
| Prepress | yes | PMG | |||
| Progressive | yes | Integra | |||
The steps listed in this document work with the cistm0407.dot template
Place your templates in the following location (on your C: drive or main hard drive):
· For Windows XP: Documents and Settings/username/Application Data/Microsoft/Templates.
· For Windows Vista: Users/username/AppData/Roaming/Microsoft/Templates.
Windows hides some of these folders by default. If you can’t see one of the folders listed, follow these steps:
1. From your current Windows Explorer window, choose Tools > Folder Options.
2. Click the View tab.
3. In the Advanced Settings pane, select the radio button next to Show Hidden Files and Folders.
4. Click OK.
In order to add or attach templates, you need access to the Developer tab in the ribbon. If it does not appear, follow these steps:
1. In Word 2007, choose Office (the office symbol in the top-left corner) > Word Options.
2. Click Popular.
3. Click Show Developer Tab in the Ribbon.
4. Click OK.
This gives you access to the Templates and Add-Ins dialog. It’s similar to the one in Word 2003. To add a template, follow these steps:
1. In Word 2007, click the Developer tab.
2. Click Document Template. The Templates and Add-Ins dialog appears.
3. Click Add. If you placed it in the location indicated previously, your template should appear in the default folder that opens.
4. Double-click the rapToolbar_win-2.1 template that you wish to add. It should now appear in the Global Templates and Add-ins pane with a check mark next to it.
5. Click OK.
To open a new document from a template, follow these steps:
1. In Word 2007, choose Office (the office symbol in the top-left corner) > New. The New Document dialog appears.
2. In the Templates pane, click My Templates. The New dialog appears. If you placed the template in the location indicated previously, your template should appear in this dialog.
3. Double-click the rapToolbar_win-2.1 template.
4. Make sure the desired template is checked in the Global Templates and Add-ins pane.
5. Click OK.
To attach a template to an existing document, follow these steps:
1. Open your existing Word document.
2. Click the Developer tab.
3. Click Document Template. The Templates and Add-Ins dialog appears.
4. Click Attach. If you placed it in the location indicated previously, your template should appear in the default folder that opens.
5. Double-click the rapToolbar_win-2.1 template.
6. Make sure Automatically Update Document Styles is checked.
7. Make sure the desired template is checked in the Global Templates and Add-ins pane.
8. Click OK.
The previous instructions ensure that the template is properly added to Word and attached to your document. Once they are completed, the following steps will enable you to access the template toolbars:
1. Make sure your template is added, attached, and checked in the Global Templates and Add-ins pane, per the previous instructions.
A new tab called Add-Ins should appear in the Ribbon, all the way to the right.
2. Click the Add-Ins tab.
3. The template toolbar appears. It is fully functional.
4. To apply a paragraph style from the toolbar, place your cursor in the paragraph you wish to style and choose the style from the appropriate menu.
For example, if you want to style a heading Section, choose Headings > Section Style.
See the standard authoring documentation for a description of the styles and detailed styling instructions.
You can configure Word 2007 to show you more styling information by default, much as Word 2003 did. Users accustomed to Word 2003 will find these tips particularly helpful.
To display Style box in your Quick Access Toolbar, follow these steps:
1. Click the downward pointing arrow to the right of the Quick Access Toolbar (which is in the top-left corner of the screen).
2. Choose More Commands. The Word Options dialog opens.
3. In the left pane, scroll down and select Style (not Styles).
4. Click Add, and click OK.
5. A box appears that shows the style of whatever text you have selected. You can also change a paragraph style by typing its name in this box. It functions exactly like using the toolbar, except you must know the name of the style you want to use and type it in the Style box.
For example, if you want to change the style of a paragraph to Body, place your cursor anywhere in that paragraph, then double-click in the Style box and type Body. Hit Enter, and the paragraph style changes to Body.
To see nonprinting characters on screen, follow these steps:
1. Click the Office button (in the very top-left corner), and click Word Options (bottom right).
2. Click the Display tab.
3. Under Always Show These Formatting Marks Onscreen, check Show All Formatting Marks (or select only the ones you want to see).
4. Click OK.
To have paragraph styles displayed along the left side of your screen (in Draft and Outline views only), follow these steps:
1. Click the Office button (in the very top-left corner), and click Word Options (bottom right).
2. Click the Advanced tab.
3. Under Display, set the Style Area Pane Width in Draft and Outline Views to .5”.